Setup and Tutorials
How to Test Each Key Before Mapping Real AI Actions
Jun
Testing keys before mapping real AI actions is not busywork. It is the difference between a controlled setup and an accidental command. HarnessKeys is designed for fast workflow control, which means each key should feel trustworthy before it is allowed to approve, cancel, submit, or trigger voice input inside your actual coding environment.
The safest first step is boring on purpose: open a simple text field, press each key, observe what happens, and write down the result. Once you know the hardware input is predictable, you can map it to meaningful AI actions with more confidence.
Start in a harmless input field
Open a plain text editor, a blank document, or a browser search field. Avoid your code editor at first because editors can intercept shortcuts, run commands, switch panels, or trigger extensions. A plain field gives you a cleaner view of what each key sends.
Press one key at a time. Do not mash keys or hold them down. Watch whether a character appears, a cursor moves, a shortcut fires, or nothing happens. If a key seems silent, test it again after clicking directly into the field.
This first pass tells you whether the computer is receiving input at all.
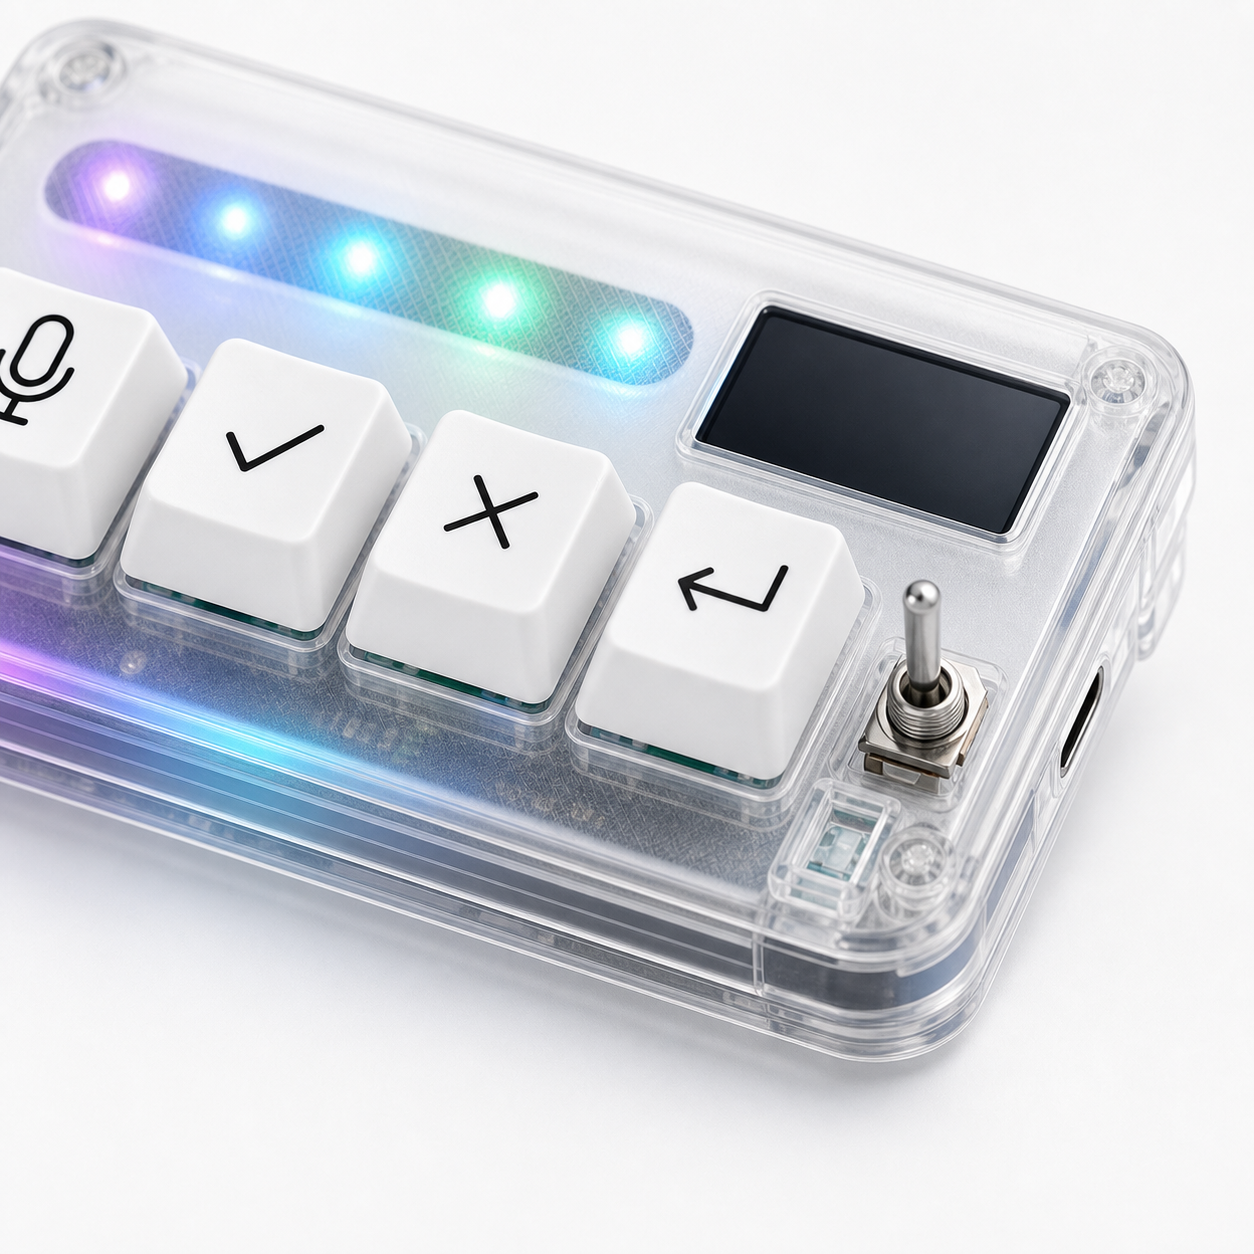
Record each key before assigning meaning
Make a quick note for every physical key. For example: top key triggers voice shortcut, check key sends approval shortcut, X key sends cancel, return key sends enter or a return action. The exact labels depend on your setup, but the habit matters.
Writing it down prevents the common first-day problem where you think you remember the mapping but press the wrong key during an AI agent session. A small note beside the keyboard for the first day is not embarrassing. It is practical.
After a few sessions, your hand will remember.
Test the mic key without a real prompt
The mic key should be tested with low stakes. Open the voice input area you plan to use and say a short phrase that does not matter. Something like “testing voice input” is enough. You are checking whether the microphone starts, whether transcription appears, and whether the active app receives the text.
If nothing happens, check microphone permission in the operating system, browser, and application. Also confirm the active microphone. A failed voice test is often a permission or focus issue rather than a keypad issue.
Only test real prompts after the microphone trigger is reliable.
Test approve with a reversible action
Approval is powerful because it can move an AI workflow forward quickly. That is also why it should be tested with something harmless. Ask your AI tool for a short explanation, a comment, or a non-destructive suggestion. Then use the approve key only when you understand what will happen.
If the approve key submits too eagerly or triggers in the wrong window, stop and adjust the mapping. A dedicated approval key should feel deliberate, not twitchy. You want speed, but not at the cost of accidentally accepting changes you have not reviewed.
During testing, reversible actions are your friend.
Test cancel while nothing important is running
Cancel is the key you will appreciate when an AI tool takes a bad turn. Test it before you need it. Start a harmless prompt or open a state where cancel has a visible effect, then press the key and confirm that the action stops, closes, or backs out as expected.
If cancel does not work in one app, test whether the app uses a different shortcut or requires focus in a specific panel. Some AI tools handle cancel differently depending on whether the prompt box, terminal, browser, or editor is active.
A cancel key you have never tested is just a decoration.
Test return in the exact places you use it
Return can mean different things in different tools. It may submit a prompt, create a new line, accept a selection, move focus, or return control to the editor. Because of that, test return in the actual places where you expect to use it.
Try it in a prompt box, text editor, AI chat field, and any coding assistant panel you use. If return submits when you wanted a new line, you may need a different mapping or a modifier key. If it creates a new line when you expected submit, adjust the workflow before relying on it.
Small return behavior differences can annoy you all day.
Check for app focus before blaming the device
Many “the key does not work” moments are actually focus problems. The wrong window is active. The cursor is not in the prompt field. The browser has focus instead of the editor. A modal is open. A terminal has captured the shortcut.
When testing HarnessKeys, always ask: which app is active, where is the cursor, and what should receive this key press? If the answer is unclear, click the intended field and test again.
This habit will save a lot of support confusion.
Move from test field to AI workflow slowly
After each key works in a harmless field, move to your AI workflow one action at a time. Test voice input. Then approve. Then cancel. Then return. Do not map all actions, launch an agent, and hope everything behaves.
A step-by-step test feels slower for five minutes and faster for the rest of the week. It gives you a clear memory of what each key does and where problems appeared.
If you hit a real product issue, document the test results before contacting HarnessKeys support. Include the order number if the issue is tied to a recent purchase.
When to trust the mapping
You can trust a key mapping when it works in a simple field, works in the intended app, behaves the same after switching windows, and does not trigger surprising side effects. That is a higher bar than “I pressed it once and something happened.”
HarnessKeys is most useful when it disappears into muscle memory. Careful testing is how you get there. Start from the HarnessKeys AI workflow keypad concept, then make each key earn its place in your actual desk routine.
Test first, map second, automate third. That order keeps the setup calm.