Workflow Design
The Best First Key Mappings for a Vibe Coding Keyboard
Jun
The best first key mappings for a vibe coding keyboard are not the most advanced ones. They are the mappings you can remember during a real session. For most AI coding workflows, the strongest starting set is microphone, approve, cancel, and return or continue.
Those four actions cover the rhythm of working with an AI assistant: explain the next step, review the output, accept what is useful, stop what is wrong, and send the next instruction. You can add complexity later. Start with a map that your hand can learn quickly.
Map the voice key to a deliberate capture moment
The voice key should not feel like a random dictation shortcut. It should mark a clear moment: now I am speaking to the AI tool. That might trigger push-to-talk, focus a prompt field, start dictation, or prepare a transcript for review depending on your software setup.
Use voice for intent and context. Say what you want changed, what should not change, what failed, or what the next step should be. Keep exact code, flags, and sensitive information typed unless your environment is private and the transcription path is reliable.
A good voice mapping makes prompts fuller without making the workflow awkward. If the key causes accidental capture, change the behavior until it has a clear start and stop.
Map approve to reviewed acceptance
The approve key should mean “I have looked at this and want to move forward.” That distinction matters. AI coding is not safe when approval becomes automatic. The key should reduce the friction after review, not remove review from the process.
In practice, approve may accept a suggestion, confirm an agent step, or move through a tool-specific approval prompt. Keep the mapping close to a single meaning. If approve does different things in different apps, write down the difference and make sure it still feels natural.
Do not map approve to “accept all” on day one unless you truly understand the tool’s behavior and have a safe recovery path. Conservative mappings age better.
Map cancel as a first-class safety action
Cancel is not the negative key. It is the key that protects the session. AI agents can drift, broaden scope, edit the wrong area, or keep producing text after the useful part is over. Stopping quickly is part of good control.
A cancel mapping might stop generation, reject a proposed change, close a prompt, or interrupt a voice capture. The exact behavior depends on the tool, but the meaning should be consistent: this path should not continue.
Place cancel where it is easy to hit intentionally and hard to confuse with approve. The hand should know the difference even when the user is tired.
Map return to the next turn
The return key is easy to underestimate because a normal keyboard already has Enter. In an AI workflow, a separate return-style key can mean something more specific: send this prompt, continue this turn, or move the agent to the next step.
This separation helps when typing and prompting share the same screen. The main keyboard can stay responsible for text. The workflow keypad can handle the moment when text becomes an instruction.
Be careful with accidental submits. If your voice workflow produces a transcript, you may want return to focus the review field first, then send after confirmation. The right setup depends on how much you trust the capture path.
Optional app-specific mappings should wait
It is tempting to make one profile for each AI tool, editor, browser, terminal, and project. That can become powerful later, but it is usually too much at the beginning. The first goal is a stable mental model.
Once the four basic keys feel natural, add app-specific behavior only where it solves a real problem. Maybe the approve key behaves differently in an editor agent than in a browser chat tool. Maybe the microphone key should focus different prompt fields. That is fine if the user can still predict the outcome.
If app-specific mappings make you pause before pressing a key, simplify. A small keypad is valuable because it can be trusted by touch.
A simple first-week mapping plan
For the first week, keep a plain mapping sheet near your desk or in a note: mic for spoken prompt, check for approve, X for cancel, return for next turn. Use it during real work, not demo tasks. Do not measure whether it feels cool. Measure whether it reduces hand travel and hesitation.
At the end of the week, look for evidence. Did you speak better prompts? Did you cancel bad agent runs earlier? Did approval feel more intentional? Did return reduce prompt-field confusion? Keep the mappings that passed those tests and change the ones that did not.
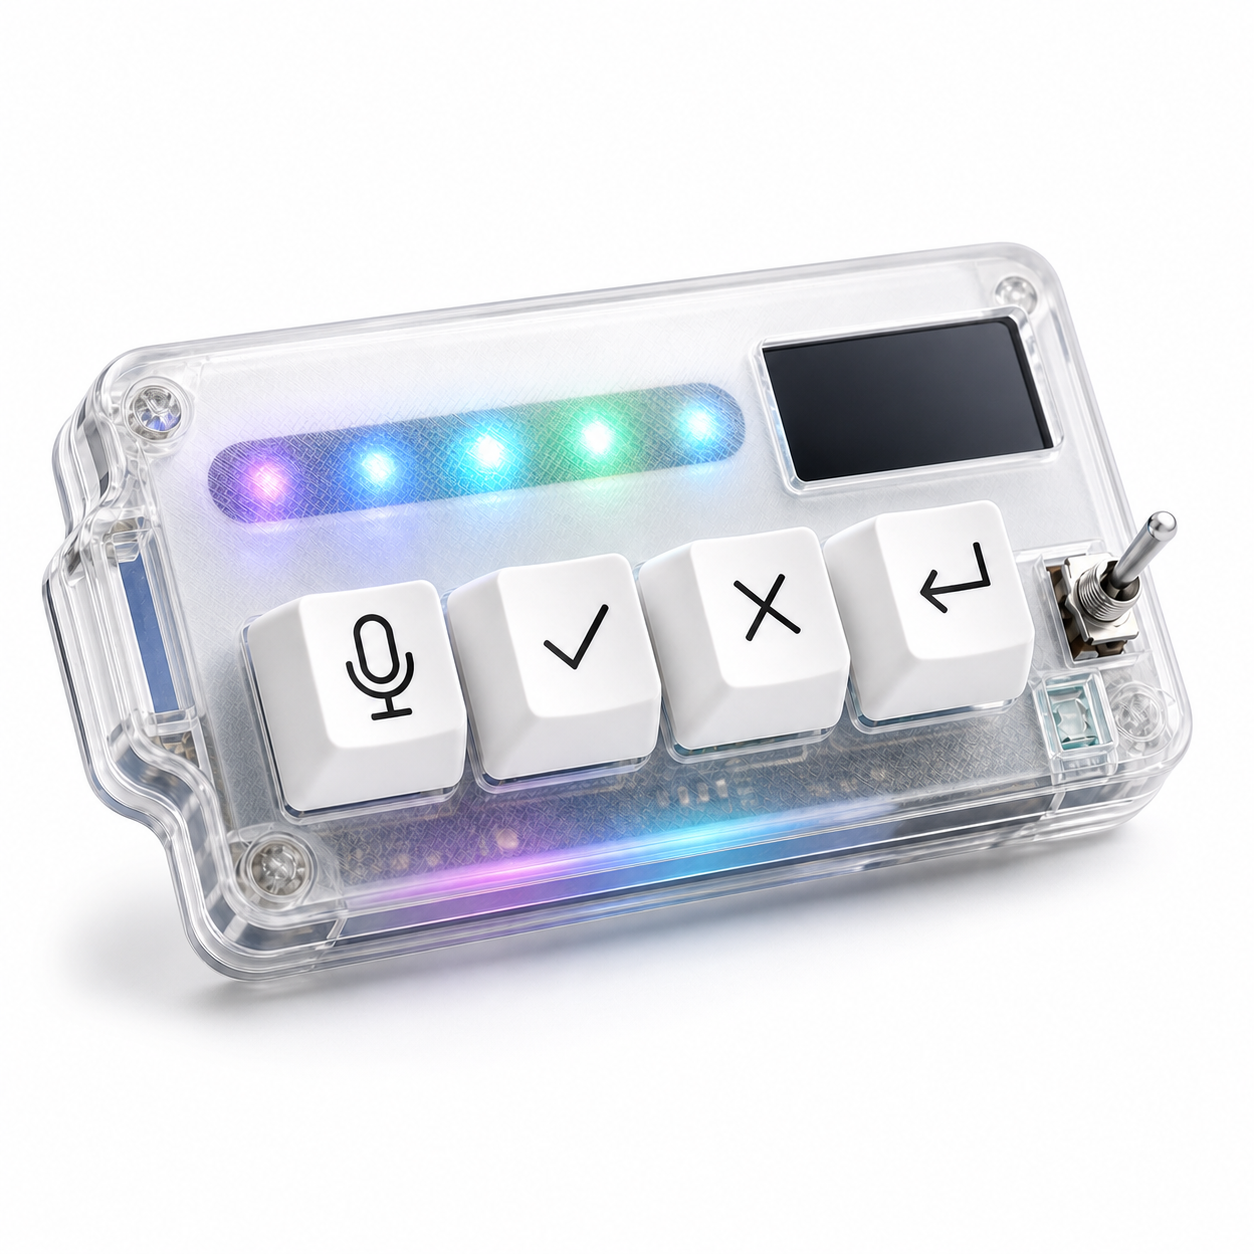
HarnessKeys is designed around this exact first mapping set. It gives the four actions their own physical keys, plus USB and Bluetooth support, a custom status screen, an RGB light bar, and a compact transparent body. You can use it as a focused AI workflow keypad rather than a blank macro pad you have to design from zero.
The best first mappings are the ones you will still use after the novelty fades. Start with mic, approve, cancel, and return. Keep the meaning plain. Let the workflow prove what deserves a physical key. For a device shaped around those first four actions, visit the HarnessKeys AI Workflow Keypad.