Workflow Design
How to Design a Vibe Coding Workflow Around Four Physical Keys
Jun
Designing a vibe coding workflow around four physical keys sounds restrictive until you try it. The limit is useful. Four keys force you to choose the actions that actually happen all day instead of building a complicated macro system that looks powerful and gets ignored.
The best starting point is not the device. It is the loop. Watch how you work with an AI coding tool: when you explain, when you approve, when you stop, when you continue, and when you reach for the mouse even though the decision is already made. Those repeated moments are the real candidates for physical keys.
Audit one real AI coding session
Before mapping anything, run a normal session and take notes. Pick a real task: fixing a bug, writing tests, refactoring a component, cleaning up a function, or asking an agent to inspect a small area of the codebase. Do not optimize during the session. Just observe.
Count the repeated actions. How many times did you type a prompt that was mostly explanation? How many times did you accept a suggestion? How many times did you stop the agent or wish you had stopped sooner? How many times did you submit the next instruction? How often did your hand leave the keyboard only to click a small control?
This audit prevents fantasy mapping. The best four keys are not the cleverest four actions. They are the four actions your workflow already asks for repeatedly.
Choose actions that are frequent and safe
A good first mapping should be frequent enough to matter and safe enough to trust. Voice input, approve, cancel, and return-style continuation are strong candidates because they sit inside the normal AI coding loop. They are also easy to understand under pressure.
A weaker first mapping is something rare or risky. Do not start with production deployment, file deletion, force-push commands, or multi-step scripts that are hard to undo. Those actions may have a place elsewhere, but they should not be casual muscle-memory controls.
Think of the keypad as a steering layer. It should help you guide the agent, not give the agent or your tired afternoon self too much power.
Give each key a plain meaning
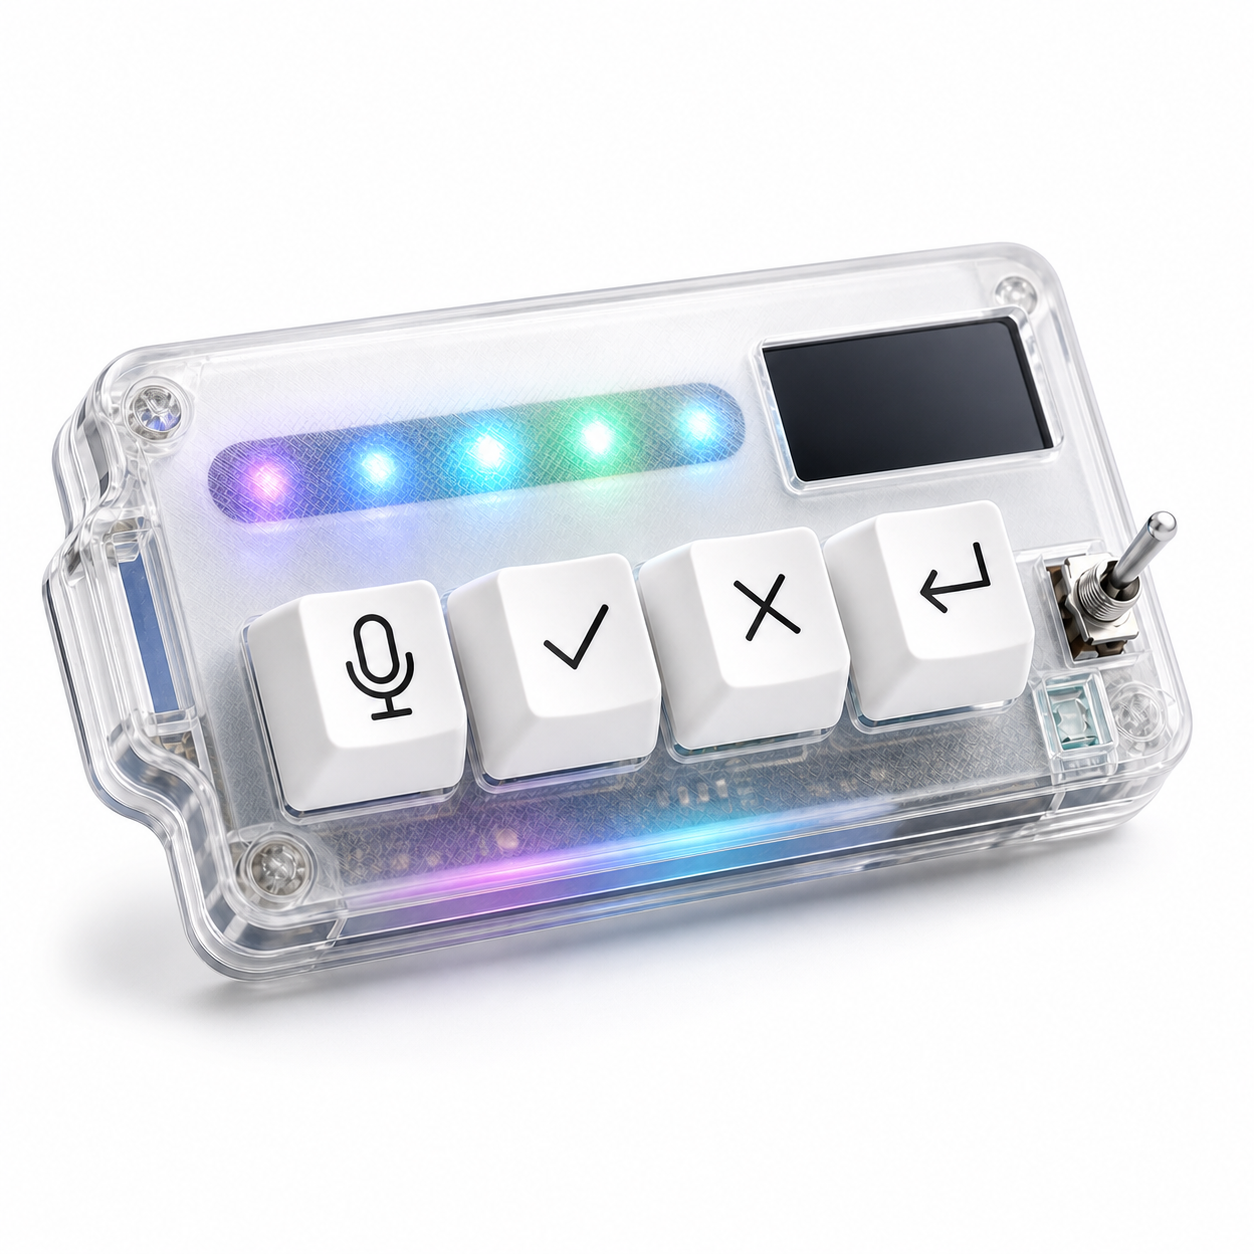
The best mapping names are short because the action should be obvious. Mic means speak. Check means approve. X means cancel. Return means next turn or submit. If you need a sentence to remember what a key does, the mapping may be too clever.
Plain meaning also helps when you switch contexts. You may use different AI tools in different projects, but the control loop can stay similar. The microphone key still starts intent capture. The approve key still confirms a reviewed step. The cancel key still stops the current path. The return key still moves the session forward.
Consistency is what makes a small device feel bigger than its key count.
Test the layout for one week
Do not judge the workflow after ten minutes. The first session may feel odd because the hand is learning a new map. Give it a week of real tasks. During that week, resist the urge to remap constantly. You need enough repetition to know whether the layout is actually helping.
At the end of each day, ask three questions. Which key did I use without thinking? Which key did I avoid? Which moment still sent me back to the mouse? Those answers are more reliable than your first impression.
If a key is never used, change it. If a key causes hesitation, simplify it. If a key is useful but placed badly, move the device before changing the mapping.
Keep review inside the workflow
A physical approve key should never mean blind approval. The workflow should still be read, judge, approve. The key only removes the interface search after judgment has happened.
The same is true for return or continue. A fast submit action is useful when the prompt is ready. It is not useful if it sends half-formed thoughts by accident. If transcription is part of your voice workflow, review the text before sending until the habit feels safe.
Hardware can make the workflow smoother, but it should not make the developer less careful. The best vibe coding setup keeps speed and judgment together.
Iterate without turning the keypad into a puzzle
After the first week, make small changes. Maybe the microphone key matters more than expected. Maybe cancel deserves a more comfortable position. Maybe return should submit in one tool but only focus the prompt field in another. Adjust one thing at a time.
Avoid building layers of hidden meanings too early. Double-taps, long-presses, profile switching, and app-specific modes can be useful, but they can also make the device harder to trust. The first goal is simple muscle memory.
HarnessKeys is built around this four-key discipline. Its microphone, approve, cancel, and return-style keys match the core AI coding loop, with USB and Bluetooth support, a custom status screen, an RGB light bar, and a compact body for desk placement.
Four keys are enough when each key has a job. Start with the real loop, map the repeated decisions, test for a week, and keep risky actions out of the first layer. If that is the workflow you want, the HarnessKeys AI Workflow Keypad gives you a focused starting point instead of a blank grid of macros.